I have started working with Ubuntu 11.10 and my first task was to install PHP, Apache and MySQL in that. This is because without these three things computer is useless for PHP Developer.
So Here I am sharing this article which shows how to install PHP, MySQL and Apache and configure with each other. This would be very useful for newbies, who have just jumped into web developing.
Before starting make sure that you have root privileges, because for some steps you need to use sudo, which will ask for the root credentials. Also we will use apt-get to download the packages. If you are not sure about sudo and apt-get then have a look at these articles. sudo and apt-get
In nutshell here are the steps which we will follow in this article:
Before starting make sure that you have root privileges.
- Install MySQL
- Install Apache
- Install PHP
- Configure PHP with MySQL
Here we will complete this whole from terminal itself. You can start your terminal using [code]Alt+Ctrl+T[/code].
Install MySQL
You need to execute below command to get it done.
[cc lang=”c”]
apt-get install mysql-server mysql-client
[/cc]
After downloading the package it will ask for the MySQL root password. It is recommoded to set the MySQL root password.
Install Apache
[cc lang=”c”]
apt-get install apache2
[/cc]
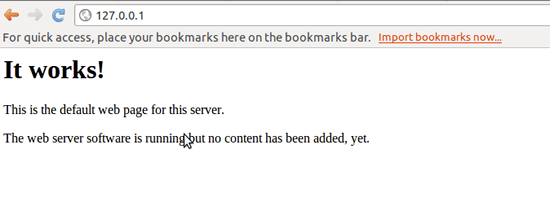
After installing this apache just type http://localhost or http://127.0.0.1 in your browser and you will see that apache is installed in your machine.

Please note that, Apache’s default document root is /var/www on Ubuntu, and the configuration file is /etc/apache2/apache2.conf.
Additional configurations are stored in subdirectories of the /etc/apache2 directory such as /etc/apache2/mods-enabled (for Apache modules), /etc/apache2/sites-enabled (for virtual hosts), and /etc/apache2/conf.d.
Install PHP
[cc lang=”c”]
apt-get install php5 libapache2-mod-php5
[/cc]
Above line shows that you have installed PHP and Apache PHP Module. After this you must need to restart your Apache web server. You need to execute below command for the same:
[cc lang=”c”]
/etc/init.d/apache2 restart
[/cc]

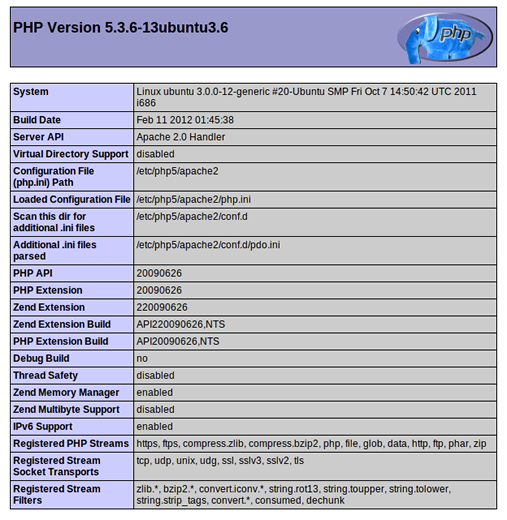
The document root of the default web site is /var/www. now we will create a small PHP file (phpinfo.php) in that directory and execute in a browser. We will display [code]phpinfo()[/code] in that file so we can gets lots of details about our setup.
You can create that file using below command, I am assuming that you are familiar with creating files and editing using vi editor.
[cc lang=”c”]
vi /var/www/phpinfo.php
[/cc]
Now we can access the http://127.0.0.1/phpinfo.php to see that php is installed and configured with apache and our php is running as a apache module. We can find this information from the server api line in the phpinfo page.
Configure PHP with MySQL
Now as we can see that we have installed PHP, Apache and configured as well. But you can see that we still do not have MySQL support for this PHP installation.
Now its time to get the MySQL support in PHP. You remember that first step in which we have installed MySQL.
So let’s configure the MySQL and PHP. You have to execute below steps to get this done.
Along with the MySQL extenstion we might need other extenstions also, so here we will install those all together. Have a look at below command for the same.
[cc lang=”c”]
apt-get install php5-mysql php5-curl php5-gd php5-imagick php5-imap php5-mcrypt php5-memcache php5-ming php5-ps php5-recode php5-snmp php5-sqlite php5-tidy php5-xmlrpc php5-xsl
[/cc]
Now after all above packages gets installed you need must have to restart the apache web server to see all the PHP supports we just added.
Execute below command to restart the apache.
[cc lang=”c”]
/etc/init.d/apache2 restart
[/cc]

Ok now you are ready to start with the PHP project in your machine. Enjoy ;)
Hope this is much clear to you and successful for you as with me. Share your thought here by comments. Subscribe to our feed, follow us and like us to get all latest updates and freebies


I think these all can be done with one command in terminal, that is: tasksel and then chose LAMP Server from the list.
There’s a much easier way to do this.
sudo apt-get install tasksel
sudo tasksel
You’ll still need to install a couple of extra packages manually – such as php5-gd.
@Gaurav and Coward
honestly i am not sure about this command, as these are my starting days with UBUNTU. Bye the way thanks for this.
[…] I am sharing this article which shows how to install PHP, MySQL and Apache and configure with each other. This would be very useful for newbies, who have …www.xpertdeveloper.com/…/configure-php-apache-mysql-on-… […]
To start a PHP+MySQL project, I would also make sure about these pointers:
1. Framework usage – if you are including a PHP framework, make sure you set your PHP include path to recognize it.
2. PHP directive date.timezone – must set this up in php.ini before running any PHP time-aware applications.
3. Set MySQL / MySQLi default socket / TCP connection in php.ini – or make sure every application you develop or deploy is configured properly to access your local MySQL.
4. PHPMyAdmin – invaluable open source PHP application to manage your development MySQL server users and data.
5. Use an integrated debugger in your PHP to be able to debug your project from your PHP IDE (stop on certain breakpoints, watch variables and expressions – better than printing out variables as you debug).
I don’t wish to sound like a marketing guy (which I’m not), but a simple Lamp is not enough these days.
If you wish to have a more robust LAMP with Zend enterprise (and cross platform) PHP and modules, including a specialized GUI to manage PHP and Zend modules and configuration, you just need to add a single DEB repository to your Ubuntu server sources (supporting Ubuntu 10.04 LTS and up), then fire up the installer with a simple command:
“aptitude install zend-server-php-5.3” – All dependent packages will be installed by aptitude.
Additional extensions are available in our repository, as well as native DB connectors, Debugger extensions, PHPMyAdmin and source PHP packages for building additional PHP extensions with a few commands.
More installation instructions here: http://files.zend.com/help/Zend-Server/zend-server.htm#deb_installation.htm
Zend Server quick overview on available editions (free VS. commercial): http://www.zend.com/en/products/server/editions
[…] might have seen my earlier post related to installing PHP, Apache and MySQL on UBUNTU 11.10. That process contains number of steps and some lengthy commands which we can not remember […]
Very useful Post thanks