
In this article I am going to share steps to create a new virtualhost for Apache in UBUNTU.
Before starting with the steps I assume that you already have installed the apache and it working properly. If you have not installed it then you just need to perform below command in the terminal.
[cc lang=”apache”]
sudo apt-get install apache2
[/cc]
Above command will need root password to complete the process.
When you are done with the apache you will get default virtualhost created for the port 80. You can confirm the same with accessing [code]http://localhost[/code] or [code]http://127.0.0.1[/code]
Earlier to create a new Virtualhost what I was used to do is; I just open the default virtualhost file which is located at [code]/etc/apache2/sites-available/default[/code]. I just open this file and place the new virtualhost code in the same file and restart the apache.
Hence that works and even it will create a new site as well but truth is; it is not correct way to perform this action. Today I am going to share Correct way to create a new VirtualHost for Apache in Ubuntu.
In this article we will create a new virtualhost for PHPMyAdmin at port 81. So you will be able to access the same at [code]http://127.0.0.1:81[/code]
If I have to say this process in short way then I would say only three steps needs to be performed which are as below:
- Create a VirtualHost File
- Enable the site
- Reload/Restart Apache
Create a VirtualHost File
As I mentioned earlier we will get default virtualhost setting once we install the apache. We will use this file as our base code and create a new virtualhost based on that.
So for that we first need to create a copy of that file. In this tutorial I am going to name this virtualhost a phpmyadmin. Just have a look at below code for copy the default virtualhost file.
[cc lang=”apache”]
sudo cp /etc/apache2/sites-available/default /etc/apache2/sites-available/phpmyadmin
[/cc]
So after executing above command you will have separate file for the new virtualhost. Now we need to edit the file based on your need. Mostly you need to edit the things which are port number and path of the site (document root).
You can edit this file in several ways. Let me give you some examples:
1) Vi Editor
[cc lang=”apache”]
sudo vi /etc/apache2/sites-available/phpmyadmin
[/cc]
2) nano Editor
[cc lang=”apache”]
sudo nano /etc/apache2/sites-available/phpmyadmin
[/cc]
3) Gedit Editor
[cc lang=”apache”]
sudo gedit /etc/apache2/sites-available/phpmyadmin
[/cc]
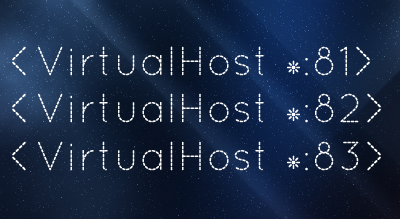
You will need root password to perform that action. When you open this file you will need to change two things only which are document root and port number. Please have a look at below image for the same.

You need to change the parts which are highlighted.
Once you are done with editing the file, it’s time to enable the site. So Let’s move to the next step.
Enable the site
Enabling the site is very easy step, you just need to perform only one command in terminal and yes you will need root access for this aswell.

[cc lang=”apache”]
sudo a2ensite phpmyadmin
[/cc]
[code]a2ensite[/code] command is used to create a proper symlink for the site and here phpmyadmin is the name of the virtualhost file it can be anything as you like.
If you want to double check that above command is executed properly then you can check below [code]/etc/apache2/sites-enabled[/code] for symlink of the new site.
Once the symlink is created now it’s time to make this site live and that can be done by reloading the apache configuration which we will see in next step.
Reload/Restart Apache
To make these configuration take in effect we will need to reload the Apache configuration. Restarting apache will also work.
[cc lang=”apache”]
// Reload the apache configuration
sudo service apache2 reload
// Restart Apache
sudo service apache2 restart
[/cc]
Once you are done with this step you will be able to access your new site at [code]http://127.0.0.1:81[/code]
Troubleshooting
As per the above process its looks pretty straightforward but if you dealing for first time with this process then there is chance that you will end up with some errors. I am going to share some errors/problems which I have faced during my turn.
(13)Permission denied: make_sock: could not bind to address 0.0.0.0:80
I was receiving above error when I was trying to restart/reload the apache. When I found the solution I laughed at myself.
You will receive this error because you are tried to restart/reload the apache but you don’t have a permission to do so. Have a look at below code block for the same.
[cc lang=”apache”]
// What I was trying
service apache restart
// What it needs to be
sudo service apache restart
[/cc]
Every command runs fine, but still you are not allowed to access the site, you get 403 Forbidden error even if you have index.html or index.php file placed in the site folder.
You might think about the configuration issue for this error but its not the configuration issue but it’s a permission issue on your machine.
The reason is that Apache user don’t have permission to access the files from the document root of the site. So what to do now? You just need to perform below two commands to make it work.
First thing you need to figure out name of apache user, generally it’s [code]www-data[/code] or [code]www:www[/code]. In my case it is www-data.
So first we will make apache user an owner of the site document root folder as well as all files and folder under that folder.
[cc lang=”apache”]
# if apache user is www-data
sudo chown -R www-data /var/www/phpmyadmin
# if apache user is www:www
sudo chown -R www:www /var/www/phpmyadmin
[/cc]
This will allow apache user to access the site files but what about the other users? We need to give at least read permission to other users. You just need to perform below command for the same.
[cc lang=”apache”]
sudo chmod -R 755 /var/www
[/cc]
So this was my experience about creating a new virtualhost (in proper way) for Apache in Ubuntu.
Let me know if anything needs to be corrected here to make this process proper, effective and quick.
If you are not able to get this done or getting any error then comments are always open here.
Subscribe to our RSS Feed by email to get all the updates directly to your email and yes don’t forget to Follow us on Twitter and Like us on Facebook.