In one of earlier article we have seen about installing MemcacheD on Ubuntu. Now in this article we will see how to install APC on Ubuntu for PHP.
What is APC?
APC Stands for Alternative PHP Cache. Let’s take definition from the php.net
The Alternative PHP Cache (APC) is a free and open opcode cache for PHP. Its goal is to provide a free, open, and robust framework for caching and optimizing PHP intermediate code.
We won’t talk much about APC on this article. In this article we will see how to install APC on Ubuntu for PHP.
This process include only two steps. You will need root access to perform these steps.
Install APC
You need to run below command on your terminal.
[cc lang=”php”]
sudo apt-get install php-apc
[/cc]
See below image for more information.

Restart Apache
Now after installing the APC all you need to do is restart the apache or php service to take the apc in effect.
Restart Apache
[cc lang=”php”]
sudo service apache2 restart
[/cc]
Restart PHP
[cc lang=”php”]
sudo service php-fpm restart
[/cc]
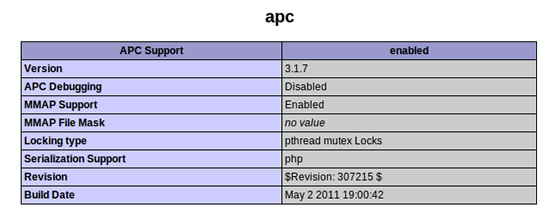
Now check your php configuration using [code]phpinfo();[/code]. Please have a look at below image you will find similar kind of block in your configuration also. If so then you are done.

Comments are always open if you have any suggestion/comments for above process.


